- Product Lines
-
Motor Homes
Motor Homes
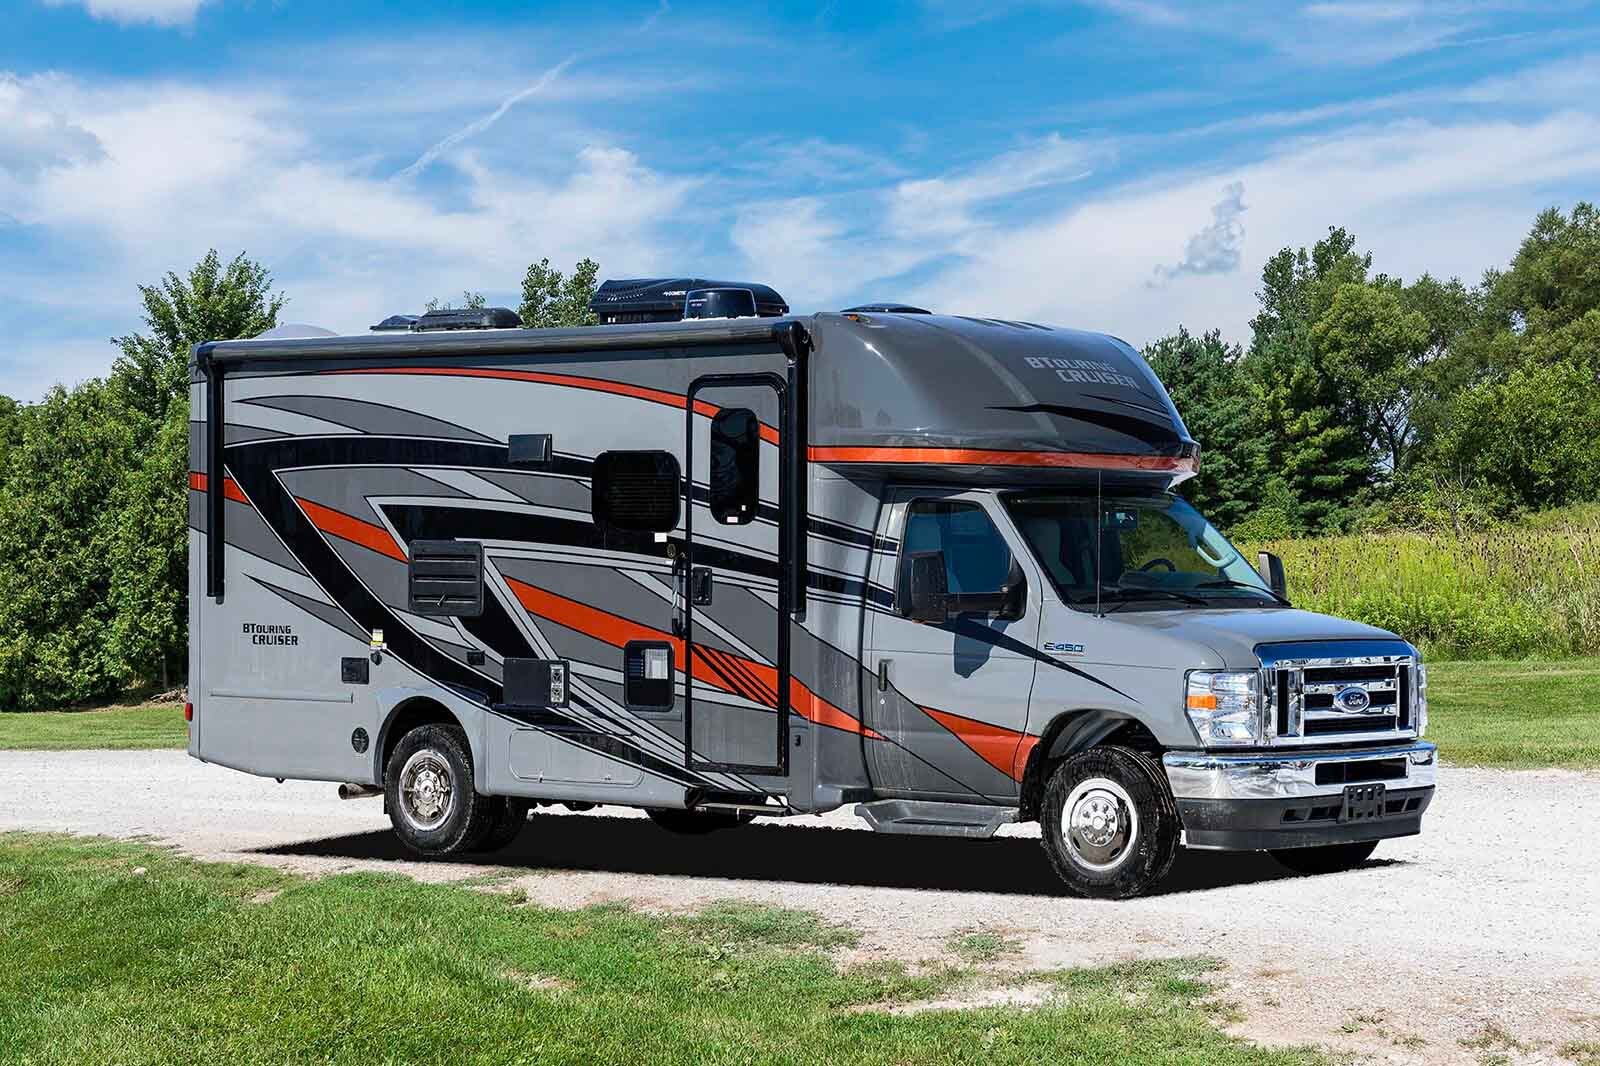
Turn the World into Your Back Yard
Explore everything from the wilderness to the big city; enjoy everything from a campfire to HDTV, all with the confidence that comes from our commitment to quality, value, and innovation. -
Travel Trailers
Travel Trailers
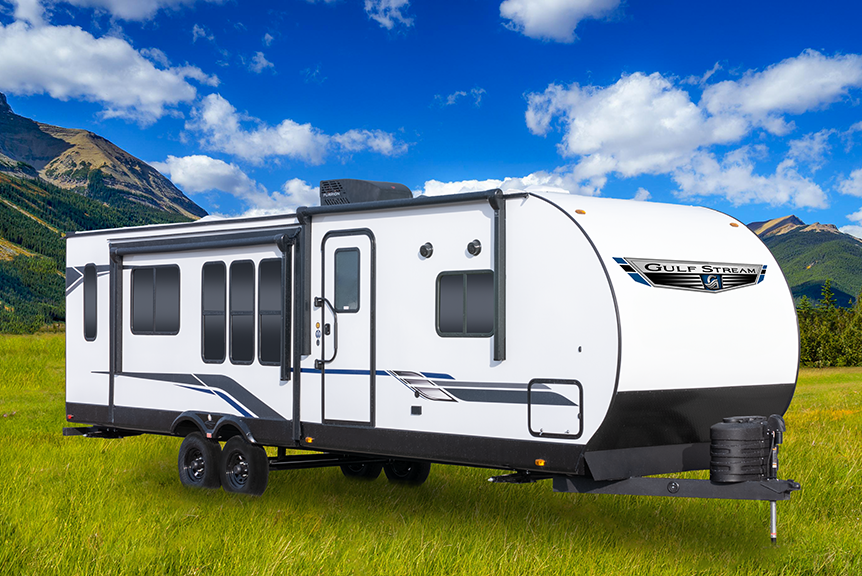
Where Experience and Innovation Come Together
Our Travel Trailers are the core of our production, featuring time-tested construction,
the latest technology, advanced materials, and stylish interiors. -
Light Weight Trailers
Light Weight Trailers
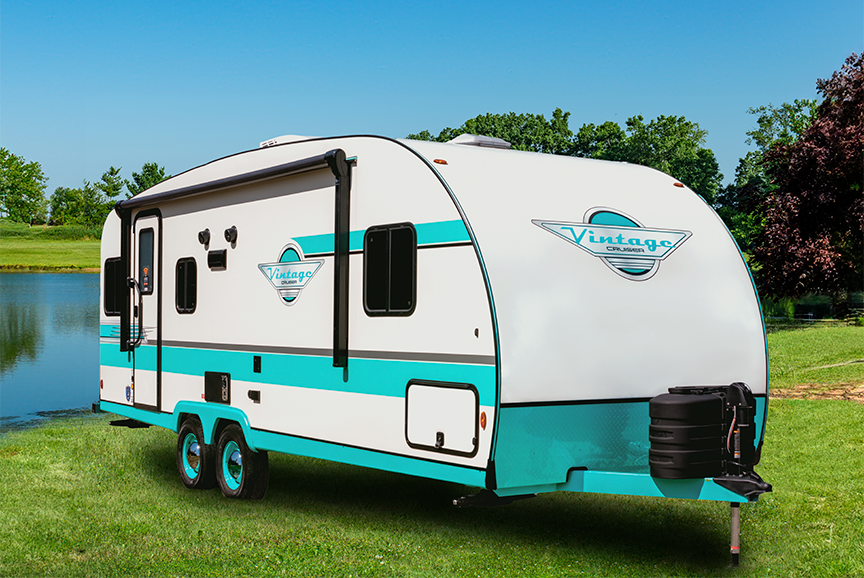
Take more stuff, have more fun in our Light Weight Trailers
By minimizing weight, we give you more capacity for people, toys, cargo, and fun - Our lightweights save money and fuel
when you're towing, and are available in all price ranges, sizes, and styles. -
Destination Trailers
Destination Trailers
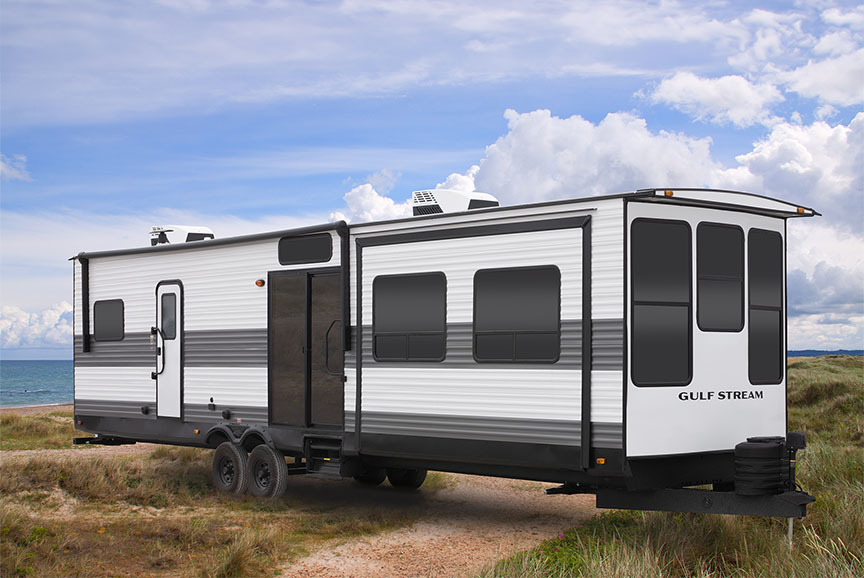
The vacation home you've always dreamed of
Love the great outdoors? Stay as long as you want! Our Destination Trailers provide your whole family with the accommodations you need for a full season of fun. -
Fifth Wheels
Fifth Wheels
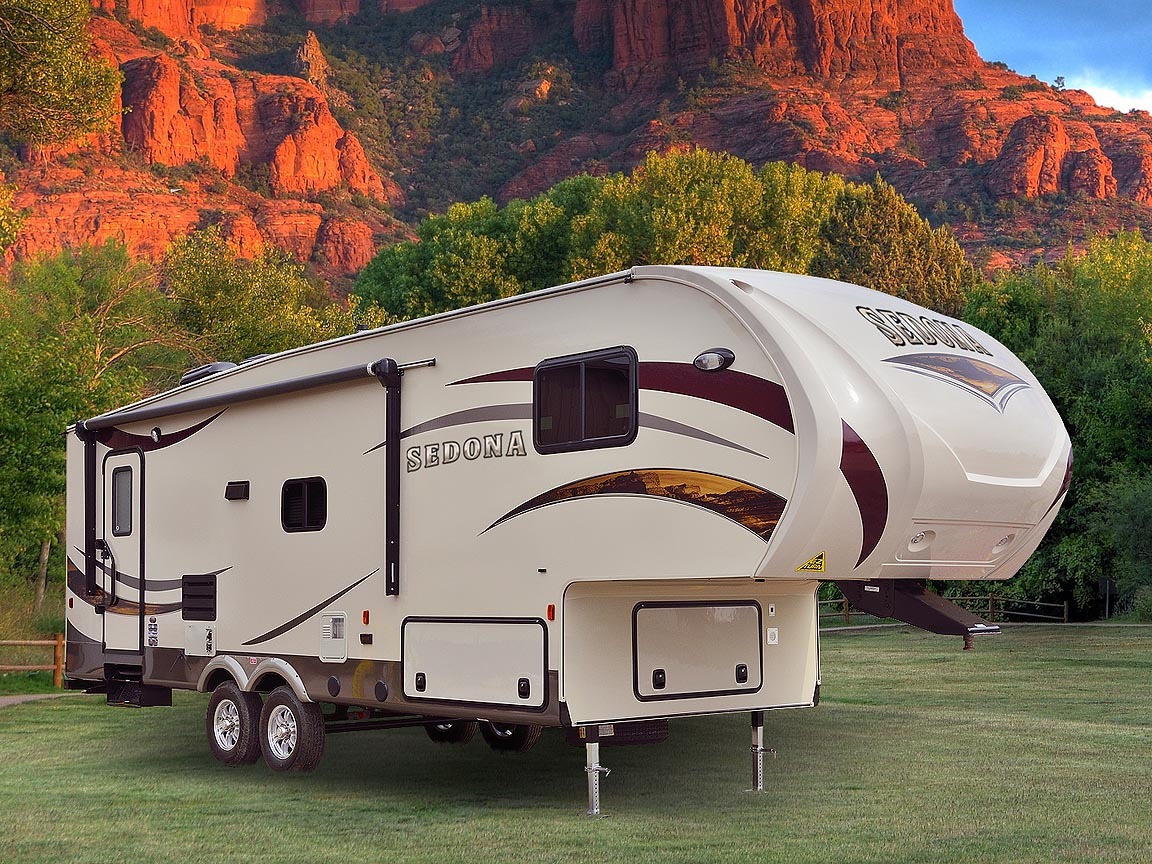
The Ultimate Towables
Our Fifth Wheels are easy to maneuver, tow like a dream, and give you great living space. No wonder they're the perfect choice for people with pickups!
-
Motor Homes
- Shopping Tools
- Dealer Locator
- Employment & Company News
- Owner Resources
RV Plumbing Basics
(Back to Table of Contents)
Your RV provides running hot and cold water and drainage systems for your convenience. The system is self-contained, and while similar to the plumbing in your home, there are differences.
The first part of the system is a tank of fresh, clean potable (drinkable) water stored in an onboard tank. Tank sizes vary, but are typically 20 to 40 gallons in size. While it would seem convenient to have much more fresh water on hand, there are very good reasons to limit the size of the fresh water tank. Water is HEAVY, impacting the handling and efficiency of your RV and reducing the carrying capacity available for other cargo. Water is readily available and quite inexpensive too, so it usually makes more sense to get what you need when you need it, instead of carrying a heavy load everywhere. Also, fresh water has to ‘go somewhere’ after you’ve used it, so the amount of fresh water you carry also impacts the size and weight of the waste tanks you need.
You’ll find a water fill inlet somewhere on the outside of your RV. Use a hose designed for potable water and a source of high-quality drinking water to fill the tank. Take care that no foreign material enters the fresh water tank, and keep the water fill inlet closed whenever possible
The fresh water tank is connected to a water heater. Two types of water heaters are in use in RVs: Tank-style water heaters are similar to standard residential gas water heaters, using a gas flame to keep a quantity of water at a pre-determined temperature. The gas burns when needed to heat the water in the tank. This type of water heater limits the amount of hot water available to users by the capacity of the hot water tank - typically 6 to 10 gallons. Tankless water heaters heat water as the water passes through a heat exchanger that is heated by a gas flame. Tankless water heaters are instantly heating water as it is used, and are designed to maintain the pre-set temperature regardless of how much water is sent through the exchanger. (Learn more about Tankless water heaters here)
- Cold water from the fresh water tank and hot water from the water heater are supplied by flexible plastic tubing to each of the faucets in your trailer. There are other important components in the RV plumbing system, including:
- P-Trap(s) - These shaped portions of drain hardware use a small column of water to keep odors from rising up through the plumbing and drain into the living space. This barrier is not functional when drains and tubing are dry.
- Hepvo Valve(s) - These specialized valves installed under the drain use a flexible membrane to keep waste tank odors from rising through the drain and into the living space. Hepvo valves function whether wet or dry.
- Water Heater Bypass - This system of tubing and valves provides a path for water that bypasses the hot water heater. This is important when winterizing the system, because it keeps anti-freeze out of the water heater.
- Low-Point Drains - As the name suggests, these are small valves in the plumbing located at the lowest point of the system, to allow water lines to be drained as completely as possible.
- Pressure Regulator - A specialized valve that protects RV plumbing from damage due to too much pressure from an outside source, such as a campground connection or city water line.
- Backflow Preventer - A valve that keeps water from the RV system and supply from backing up into the city/campground water supply.
- In-line Pre-Pump Filter - This filter, placed between the fresh water tank and the 12V pressure pump uses a screen and other filter media to remove particulate contamination from the water before it reaches the pump.
- The tanks and tubing in the fresh water system are pressurized by a small 12-volt pump; that pump must be connected to a 12V power source like the RV “house battery” to work. A sensor detects any loss of pressure in the system and turns the water pump on to restore it. That means it is typical to hear the pump turn on to restore pressure as soon as you begin to use water from any faucet. It’s not unusual to hear the pump cycle briefly at other times due to minor water and air leaks in the system.
Once water in the fresh water tank is filtered by the Pre-Pump filter, pumped through tubing by the 12V pump, with one line passing through the water heater, the water is directed to the various faucets.
As an alternative to the onboard water system pressure pump, many campgrounds and other recreational facilities provide pressurized connections to drinking water for RV campsites. You can connect your RV to the supply of fresh water using a hose designed for potable water, and use the campground supply instead of the water in your fresh water tank.
Typical RV systems have two waste tanks: A ‘black tank’ for sewage from toilets, and a ‘grey tank’ for the drains in sinks, showers, and tubs. Both of the waste tanks are of limited capacity, typically 20 to 40 gallons each. Most RVs are equipped with gauges that use floats to monitor the fluid levels in the tanks.
Unlike the fresh water side of RV plumbing, the sink, shower, and tub drains use gravity instead of a pump to move water to the grey tank.
The fresh water system provides water to toilets. The toilets then use a sealed, self-contained pressurized system to evacuate waste and reduce odors. The vacuum pressure sends these black water wastes to the black tank. Seals need to be working properly for the system to perform well. The nature of the system also makes it important to keep anything that may clog pipes or drains out of the toilet. This includes the requirement that toilet paper formulated for use in RV toilets be used in place of ordinary TP.
RV plumbing is somewhat similar to residential plumbing but the differences are important to note:
- To minimize weight, simplify installation, and reduce costs, RV systems use flexible plastic tubing in place of of copper or PVC.
- Some fittings, valves, joints, and connections use molded plastic, not metal.
- Due to the constant on-the-road vibration and temperature extremes, RV plumbing fittings and connections can loosen over time, and should be checked and finger-tightened regularly. Regular inspection and adjustments are considered owner routine maintenance.
- Specially formulated chemicals are available to help eliminate odors and break down sewage components in RV toilets.
- Many household cleaners, polishes, and abrasives should not be used on plastic plumbing fixtures. Mild detergents and cleaners designed for RVs should be used instead.
- Household toilet paper should not be used in an RV toilet. Toilet paper formulated to decompose quickly is readily available for use in RVs.
- RV water heater tanks use a special metal rod to displace dissolved solids from fresh water so they don’t contaminate the rest of the system. The metal rod, called an anode, has to be checked and replaced over time.
- The entire water system should be drained, flushed, and winterized whenever the RV is likely to encounter freezing temperatures for an extended length of time. Winterizing is the subject of a separate article where it is discussed in detail.
Grey and black tanks should be emptied when they near capacity. In some RVs a single drain line connects the grey and black tanks so they can be emptied at the same time; in other installations, two drains are used and tanks are emptied separately. All RV waste must be dumped in compliance with local regulations. Check to make sure you know and follow these regulations. Provisions for dumping RV waste are available at most public and private campgrounds, many RV dealerships, and certain rest areas and travel facilities.
Typically the dumping process involves connecting one end of a lightweight, collapsible, large-diameter tube to the RV drain line, and the other end of the tube to the sewer opening. Tubing designed for this purpose are readily available from any RV supplier. The tube used to drain sewage should be free of kinks, and provide a down-stream path for the flow from the tank to the sewer. With the hose in proper position, it is safe to open the valves on the RV drain line so fluids can drain from the tank. Some RVs include a special port that allows a hose to be connected so fresh water can be used to flush out the waste tank to complete the process.
Because of the way it is used, the sewage hose should be dedicated solely to the task for which it was designed. Disposable gloves are also useful.
For all the details of the Dump Station/tank draining process, see our article on Dump Station Basics.